How To
How To Create A FreeForm ScrapeMap
The FreeForm type of ScrapeMap is ideal for web scraping a few data points from a web source. This tutorial provides a simple example of creating a FreeForm ScrapeMap.
In this example let’s get the data associated with the cheapest flight from New York to Hawaii.
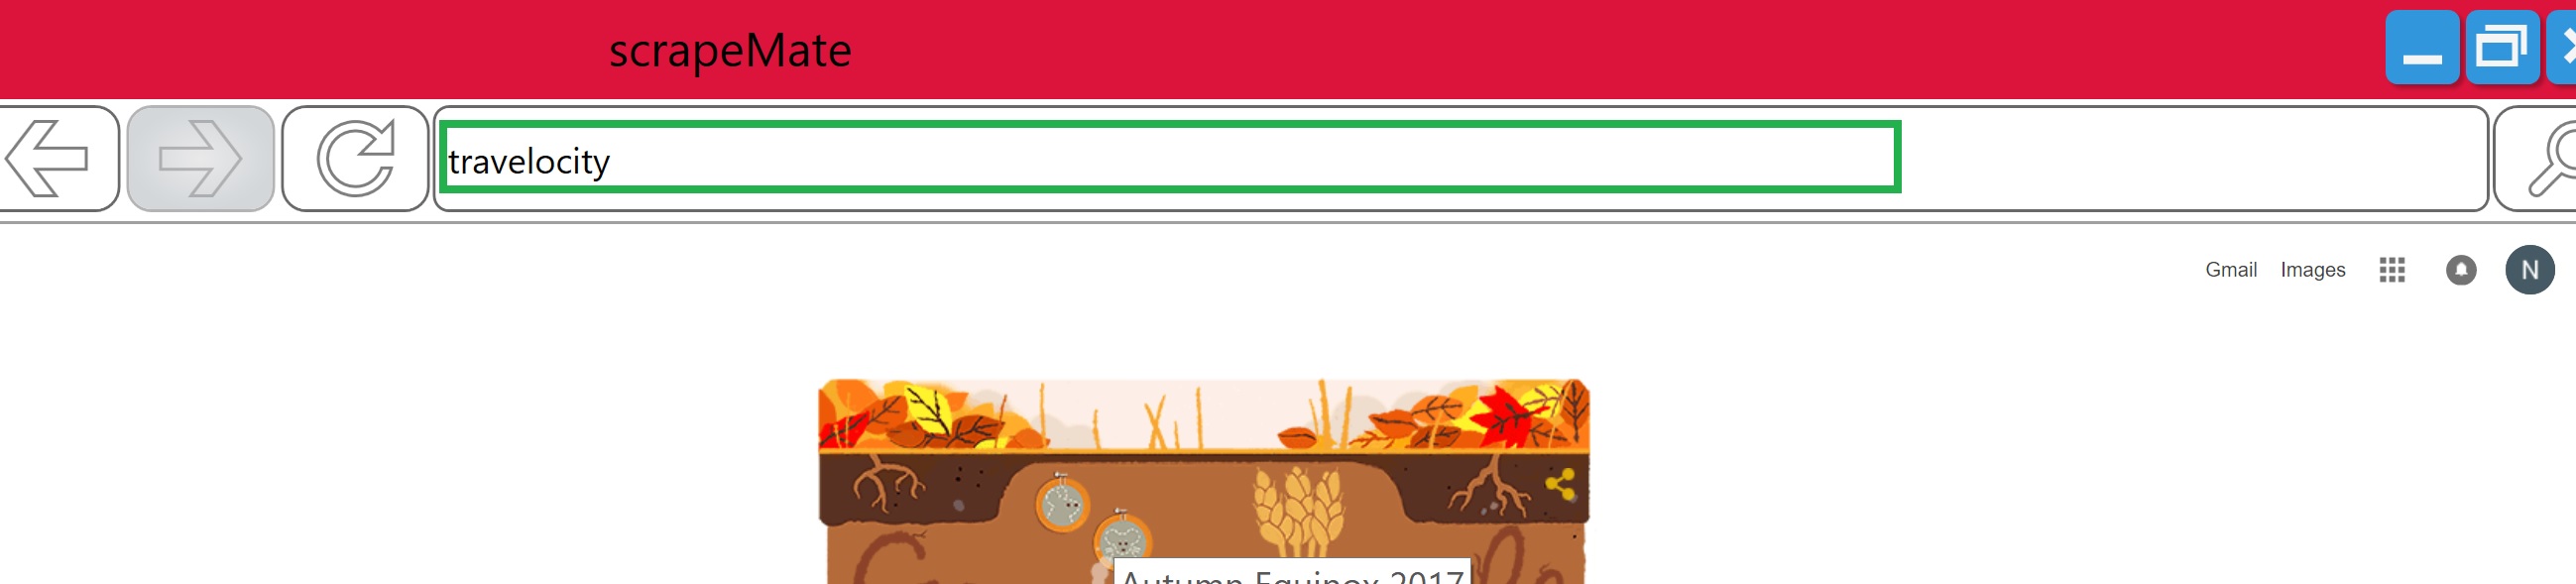
Let’s start by typing “travelocity” into the navigation bar above the Source Browser pane.
In the Google search results select Travelocity’s homepage. Once there select flights only and specify you’d like to fly from New York to Honolulu at some future date. Select “Search” to get to a list of flights.
Now that we’re at our preferred page let’s create our ScrapeMap. Select the Create ScrapeMap button from the ScrapeMap toolbar
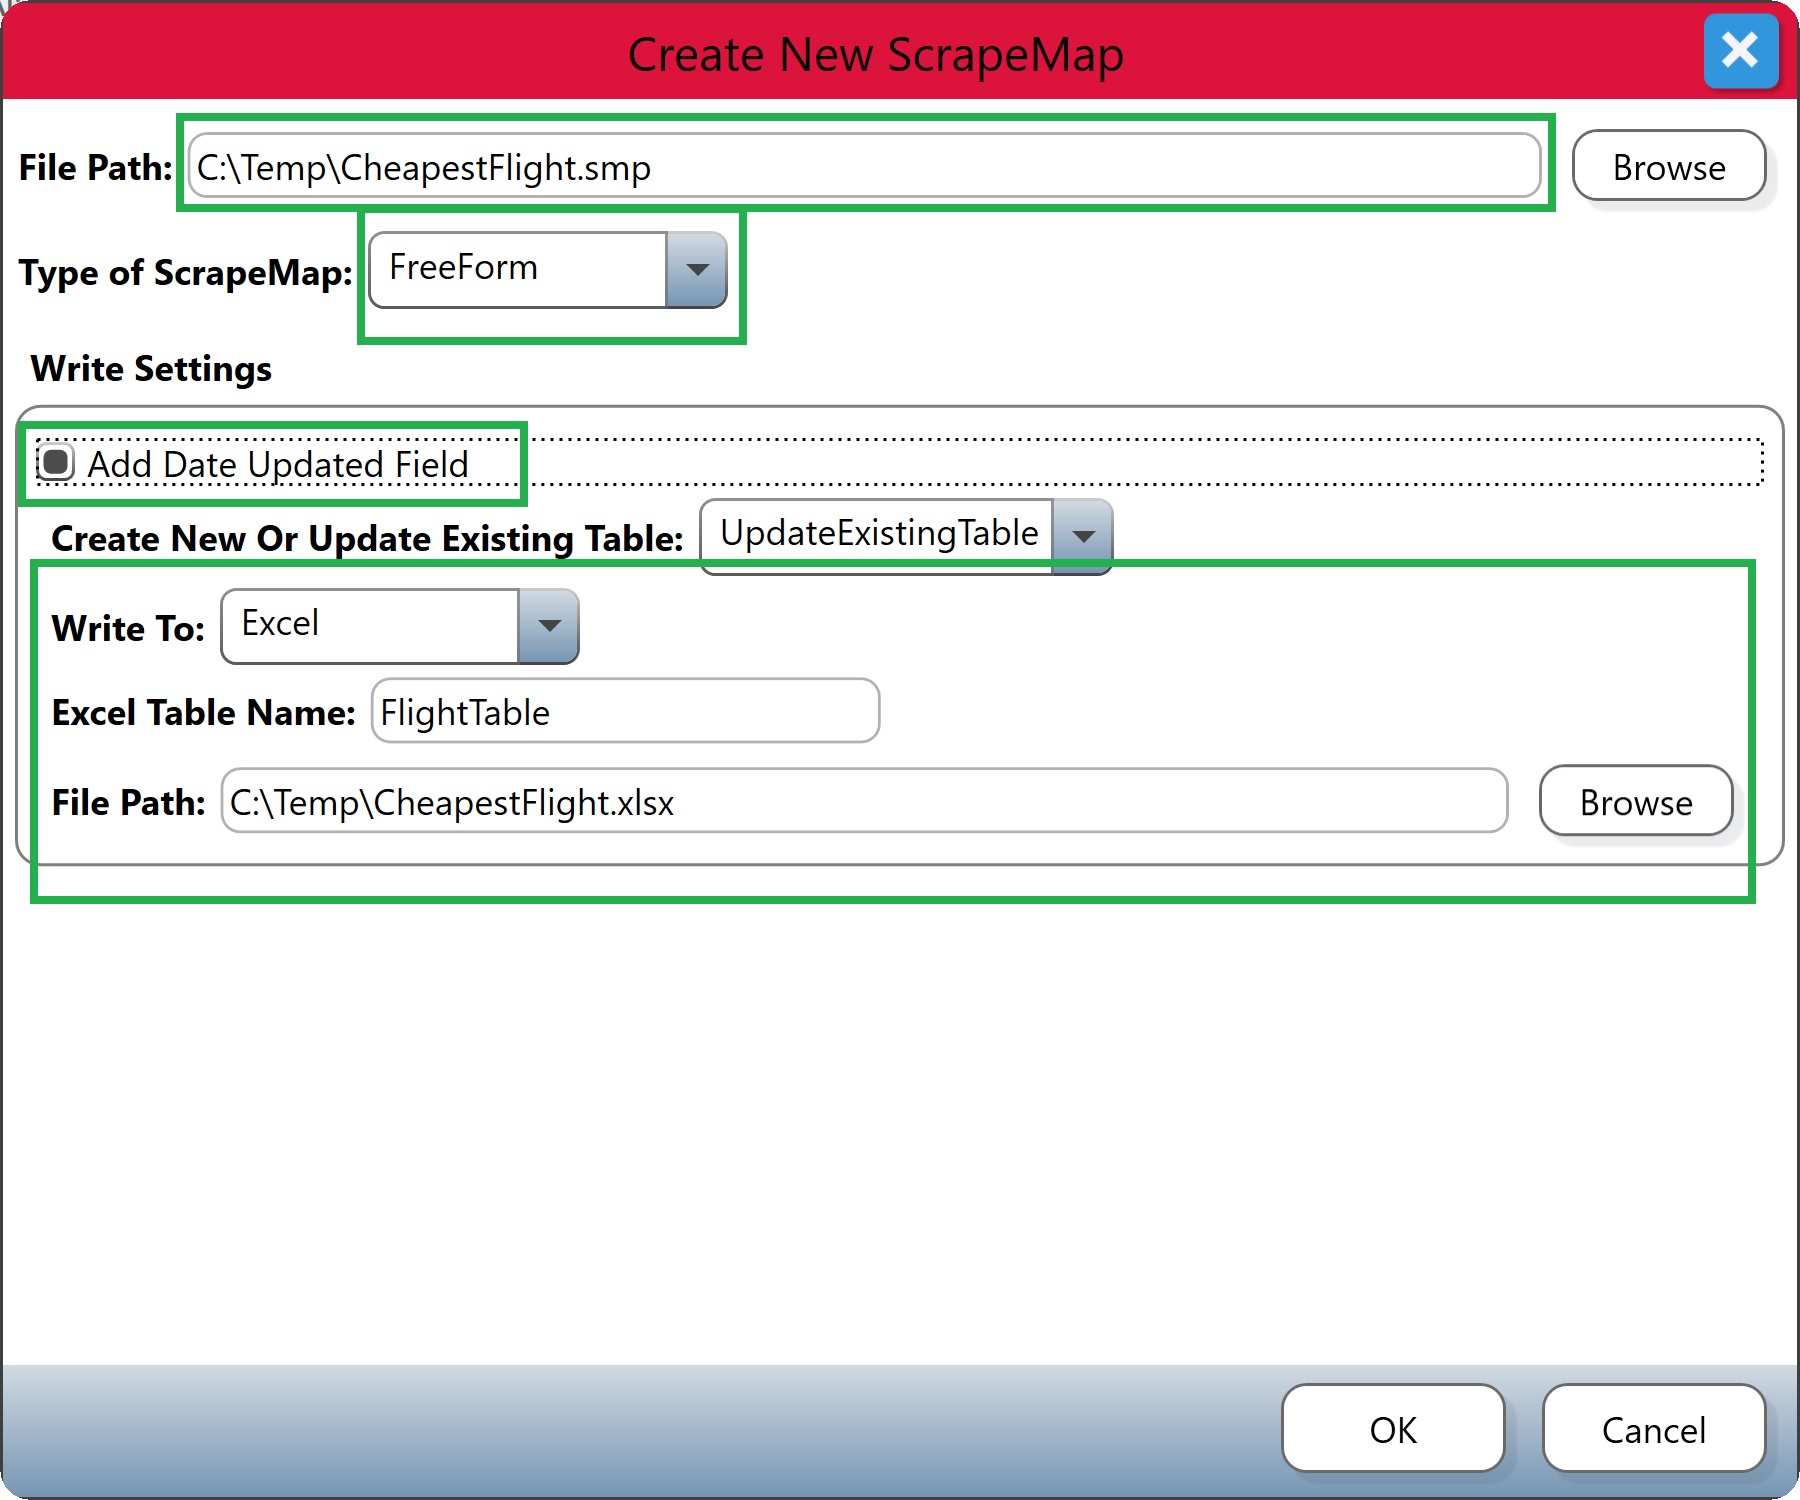
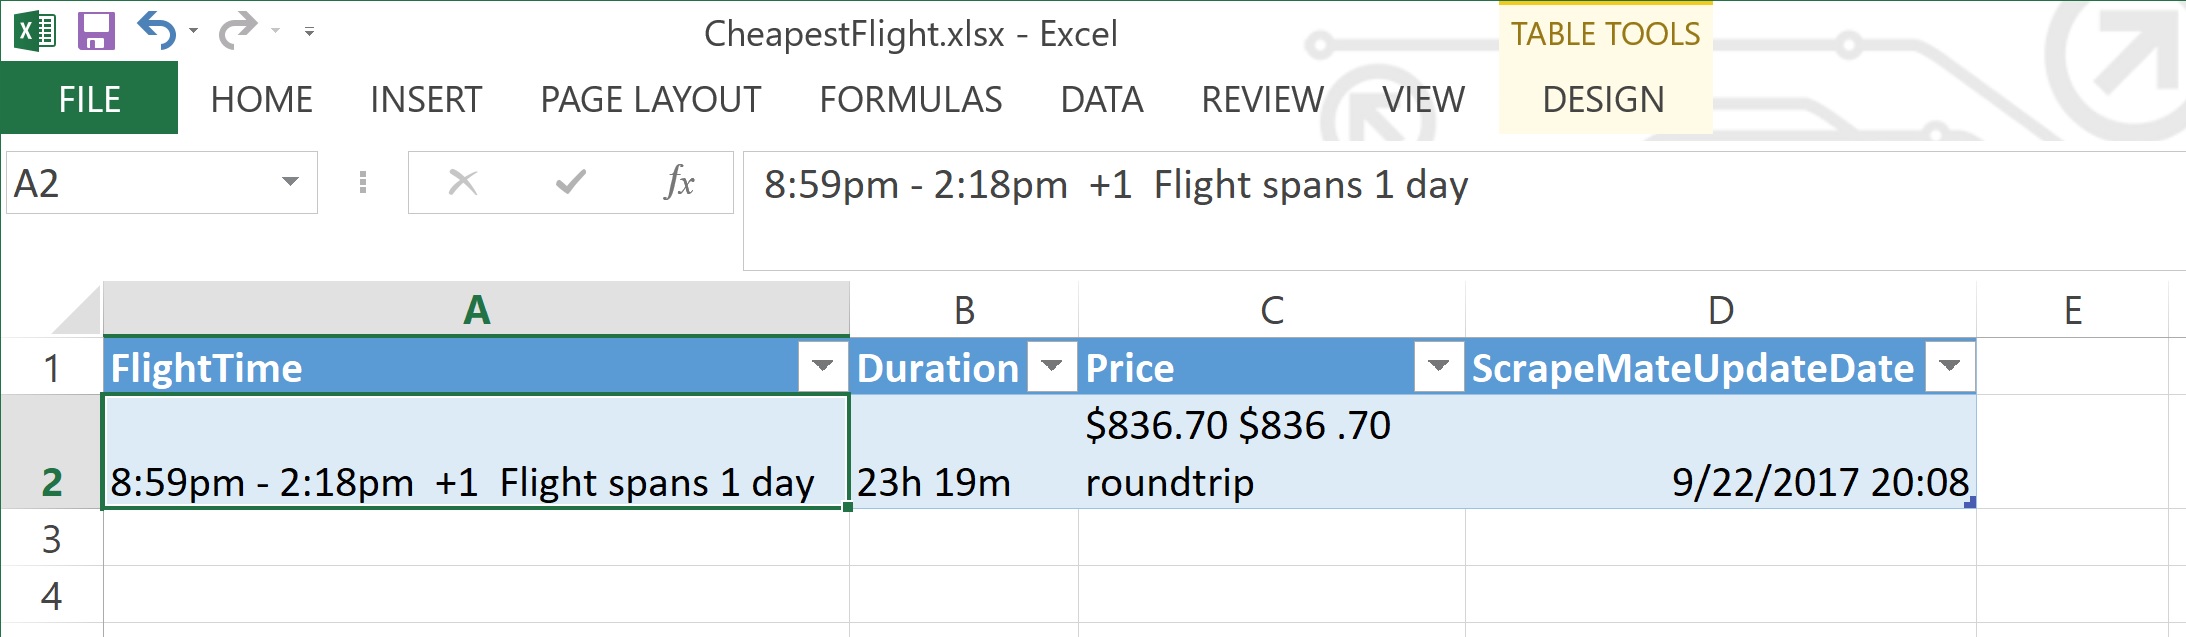
Fill out the File Path for the new ScrapeMap. Make sure the Type of ScrapeMap is set to FreeForm. Enable Add Date Updated Field. Make sure Create New Or Update Existing Table is set to UpdateExistingTable. Lastly, choose to Write To Excel and specify an appropriate Excel Table Name and Flight Path. Keep in mind the Excel Table Name refers to the table created in an Excel Worksheet and not the Worksheet itself. An Excel Table Name cannot contain any special characters or spaces. If you are new to Excel Tables you can find more information here. Select OK to create the ScrapeMap.
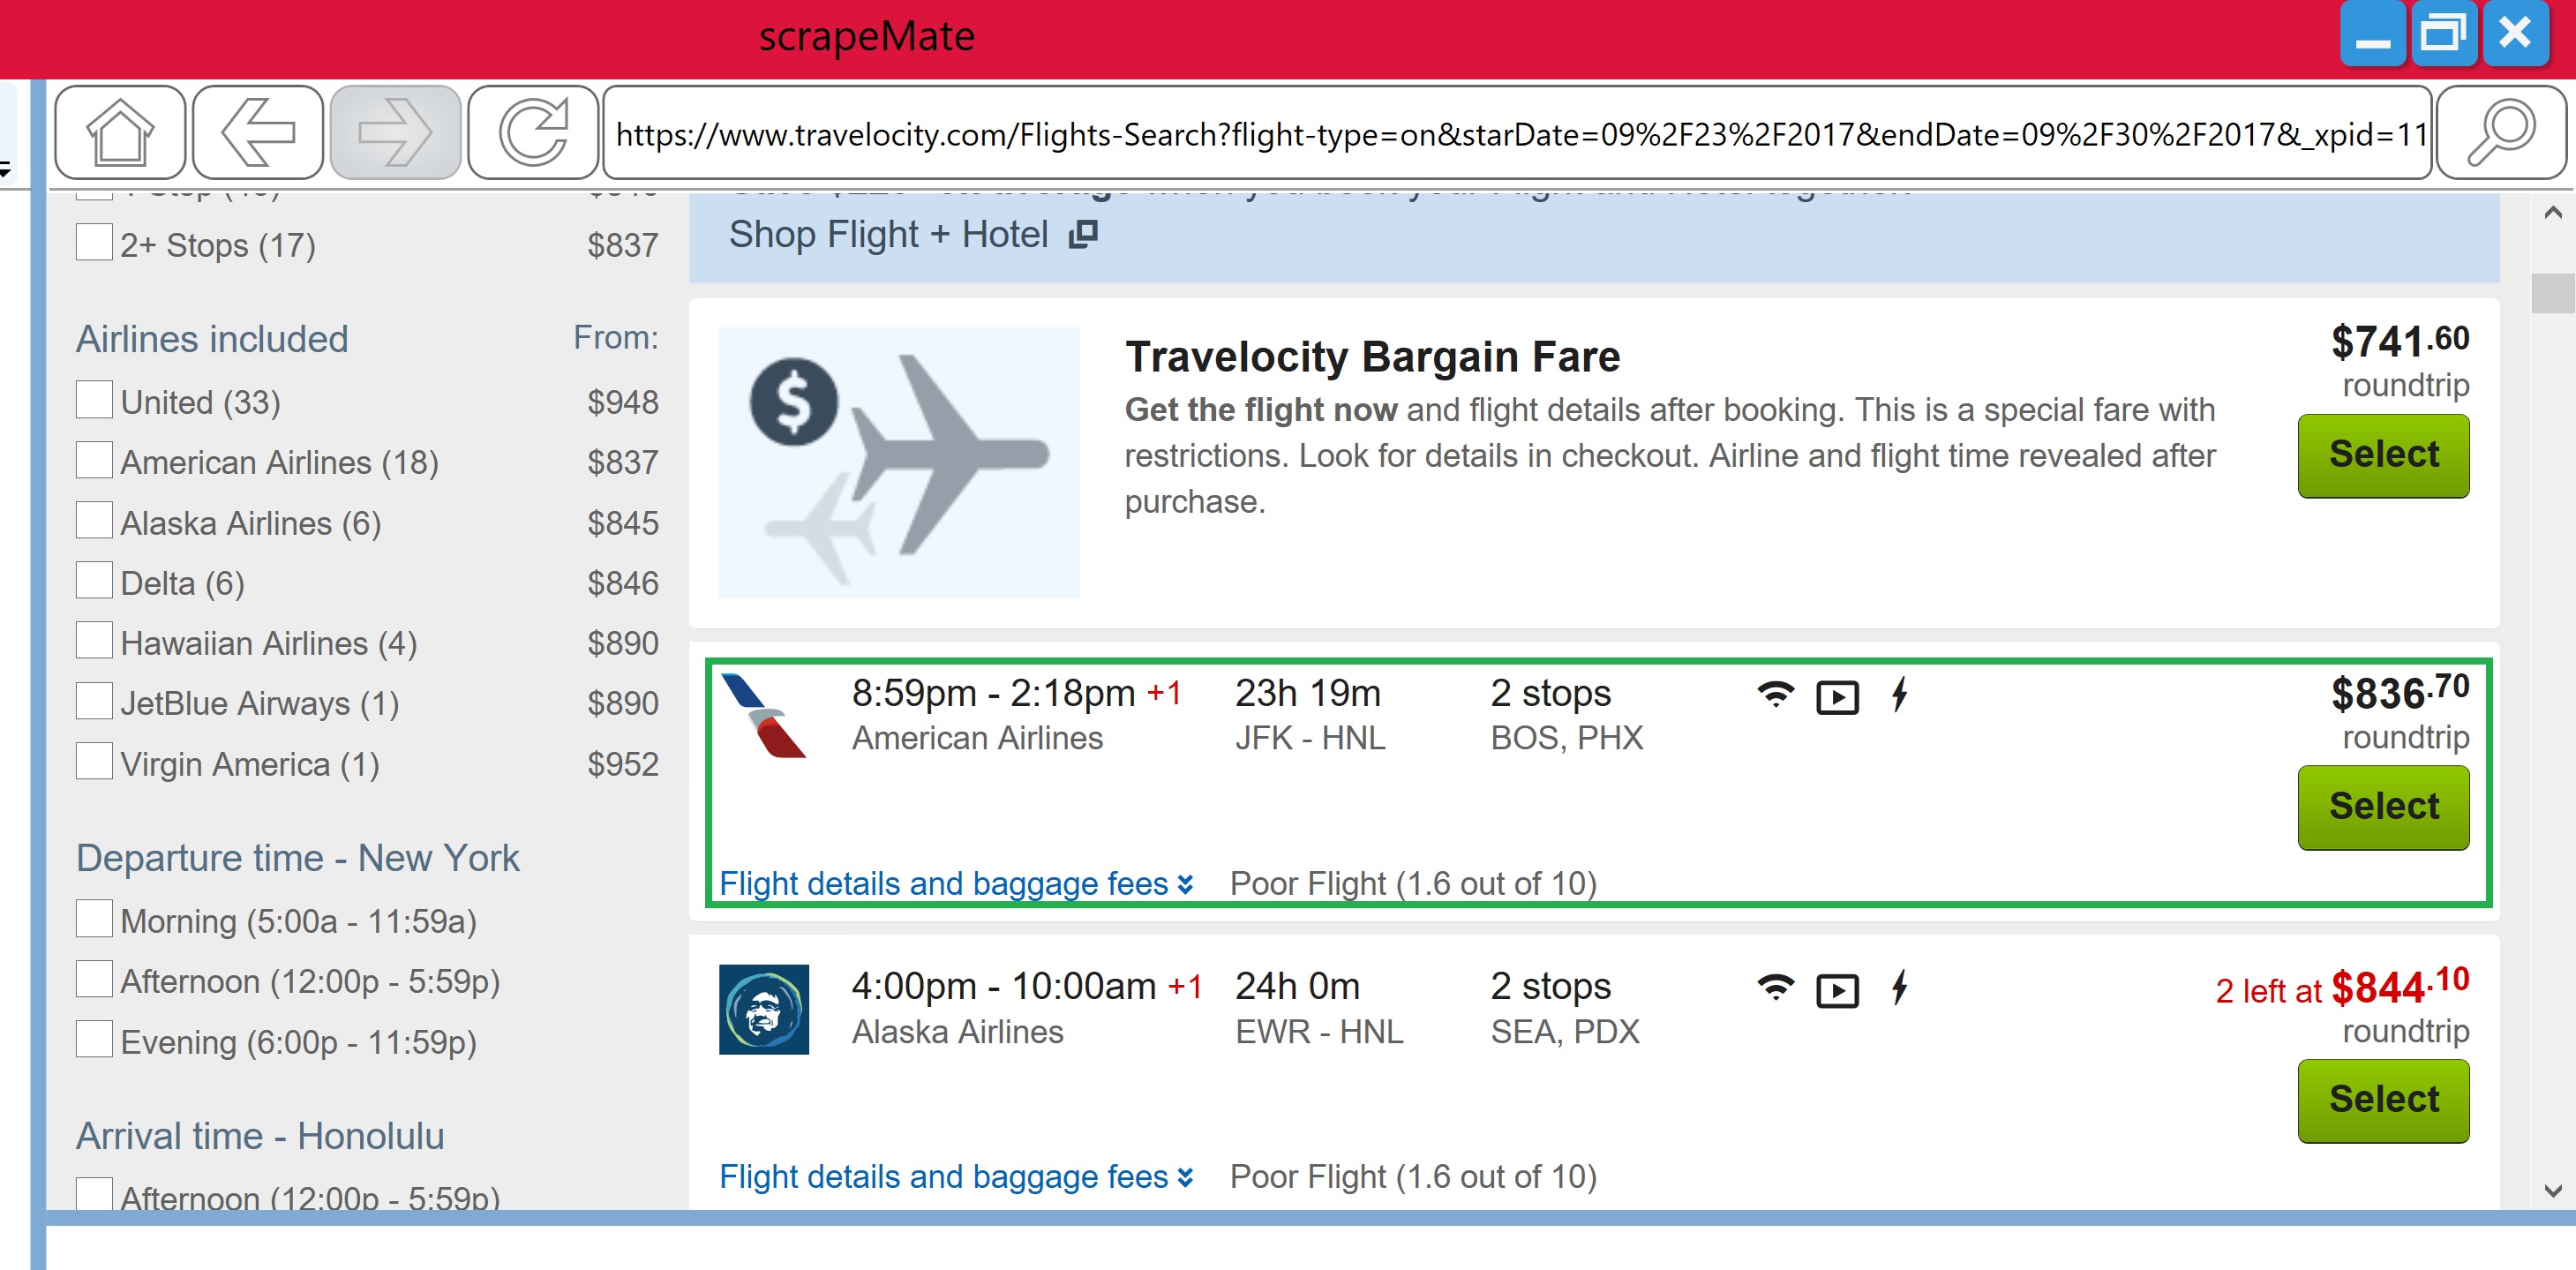
Now that our ScrapeMap has been created let’s capture the data of the first search result. For my search this is the item just below the “Travelocity Bargain Fare” listing.
Let’s create our first DataAddress by selecting the time of the flight. Make sure that all the data you wish to capture is highlighted in yellow.

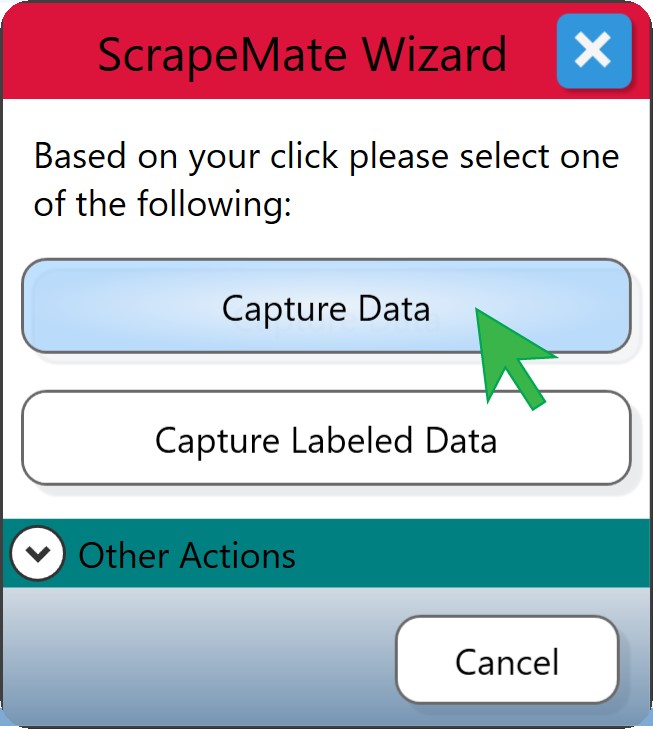
In the ScrapeMap Wizard Dialog select Capture Data.
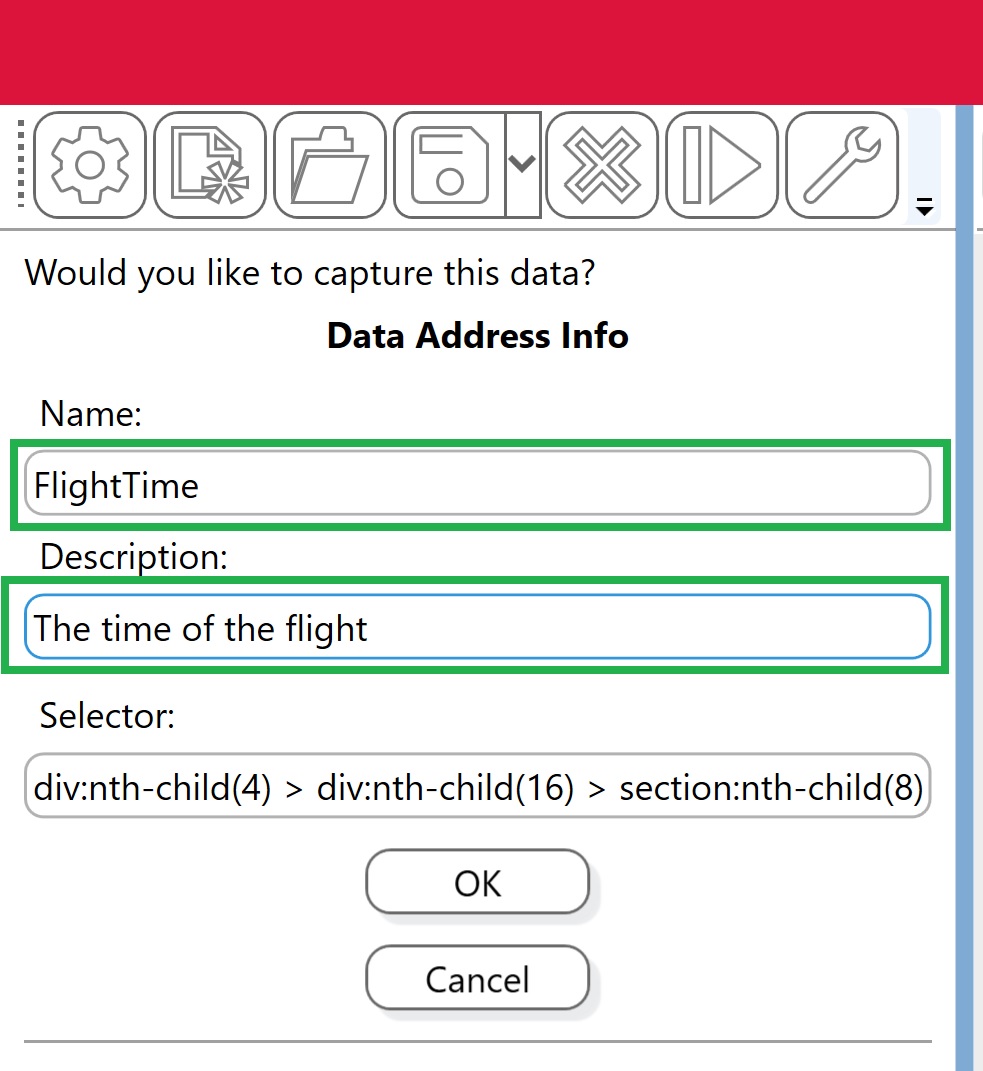
In the follow-up ScrapeMap Wizard pane Name your DataAddress and give it a Description. The DataAddress is usually used as the header for you data when it is written to the destination table. Keep in mind that all each DataAddress must have a unique name and that name cannot contain spaces or special characters. For this first DataAddress I will set the Name to “FlightTime” and the Description to “The time of the flight”.
You will see the FlightTime DataAddress added to your root ScrapeMap InstructionSet.
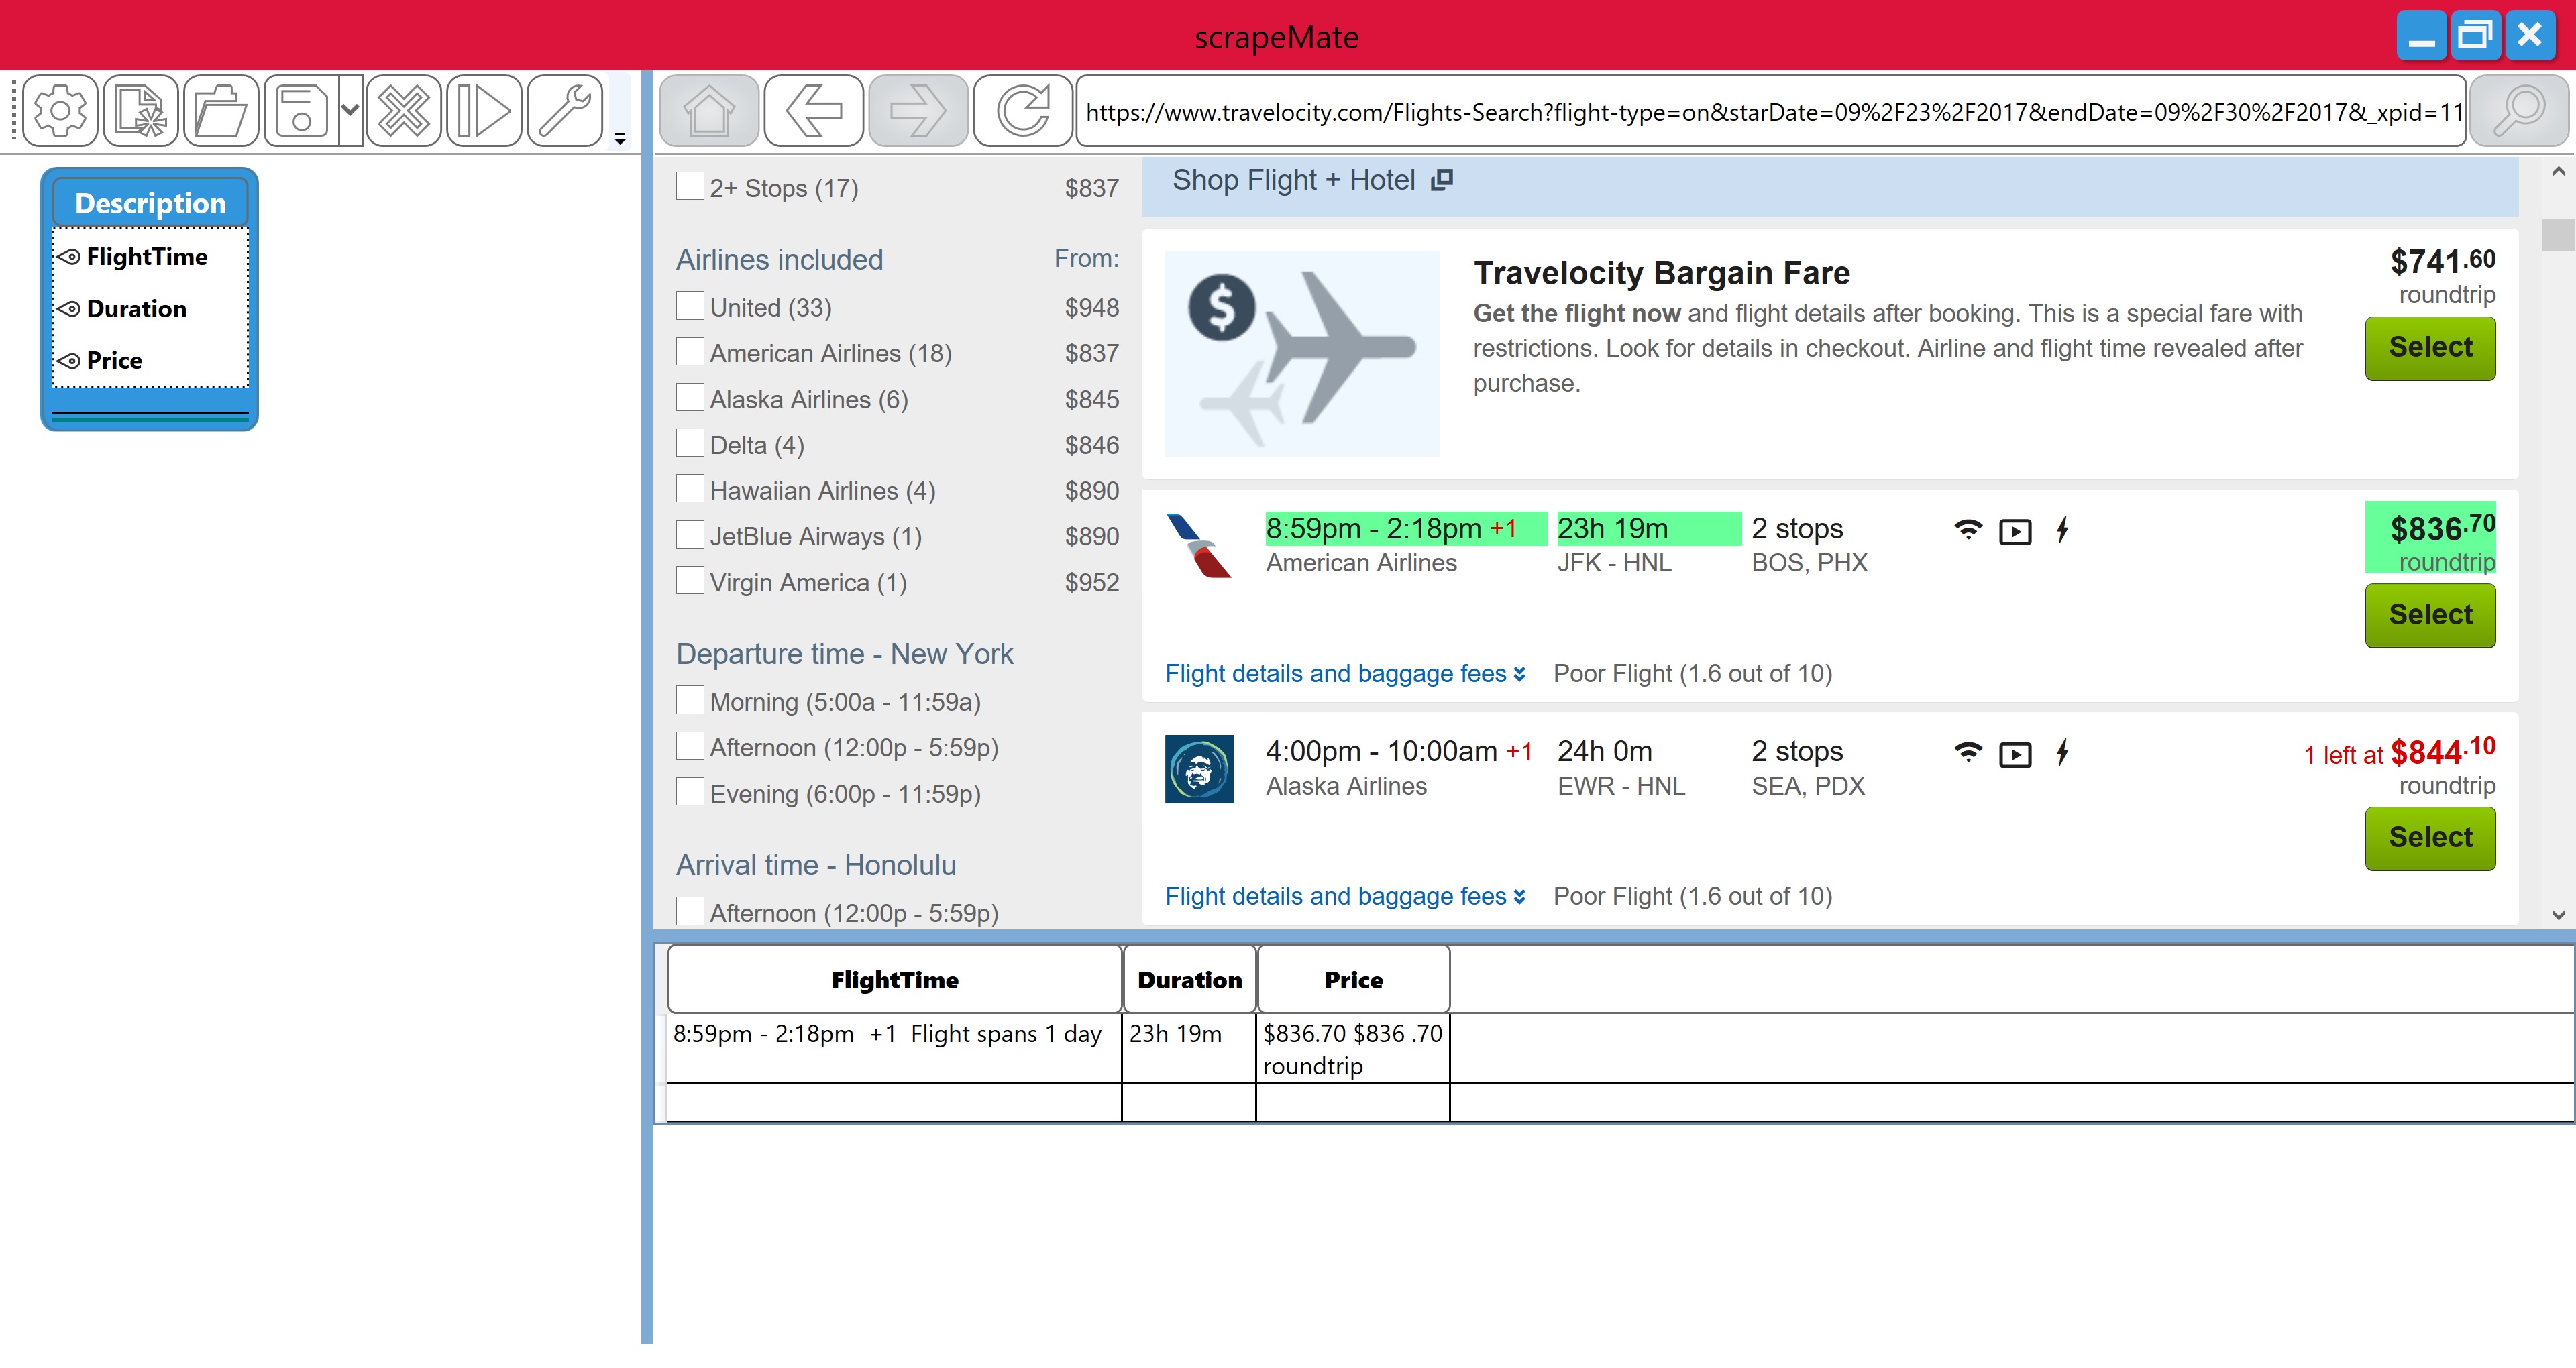
Now let’s grab some more data about this cheapest flight. Click on the duration of the flight. As with the previous example select Capture Data from the ScrapeMap Wizard Dialog. Let’s give this DataAddress a Name of “Duration”. Select OK to create the DataAddress. Repeat this process one last time for the price of the flight. Naming the DataAddress “Price”. As you have added DataAddresses you should notice that the Data Preview pane under the Source Browser has updated with the data you have selected. Your application should now look like the screenshot below.
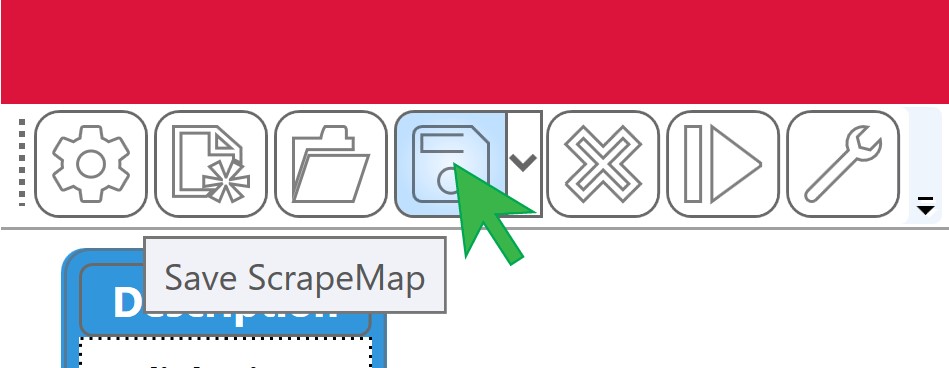
It is a good practice to save your ScrapeMap before you run the application in case any problems occur while scraping web data. Save the new ScrapeMap.
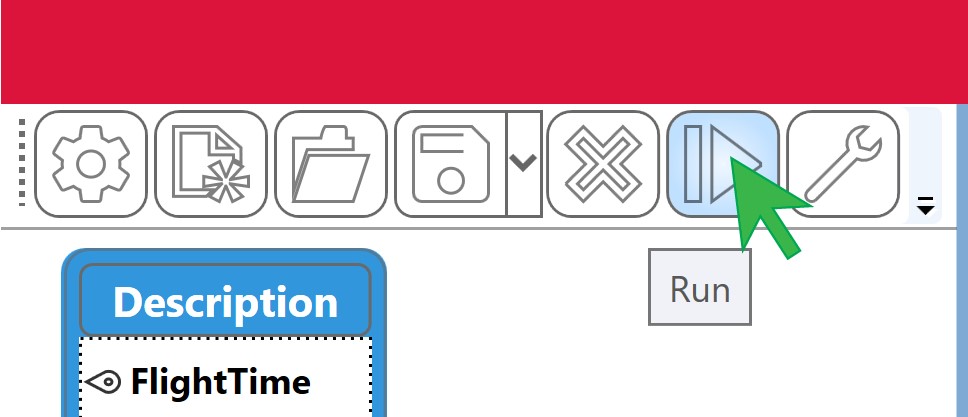
Now click the Run ScrapeMap button on the ScrapeMap toolbar to begin web scraping.
Because this is such a small amount of data the ScrapeMap should soon finish running.
The Excel file that is created should resemble the screenshot below. A new row will be added to this table with each subsequent ScrapeMap run.